Material in/out list
This shop-floor screen handles both material receiving (inbound) and issuing (outbound) on one screen. You complete waiting inbound and outbound records, or register new inbound and outbound records by manual entry, barcode, or AI recognition. The quantities you save are applied to stock by warehouse.
Screen layout
At the top are the search box, the calendar button, and the New inbound button (New outbound on the outbound screen). Below them are the inbound and outbound tabs and the material cards. When you first open the screen, the records planned for today are shown.
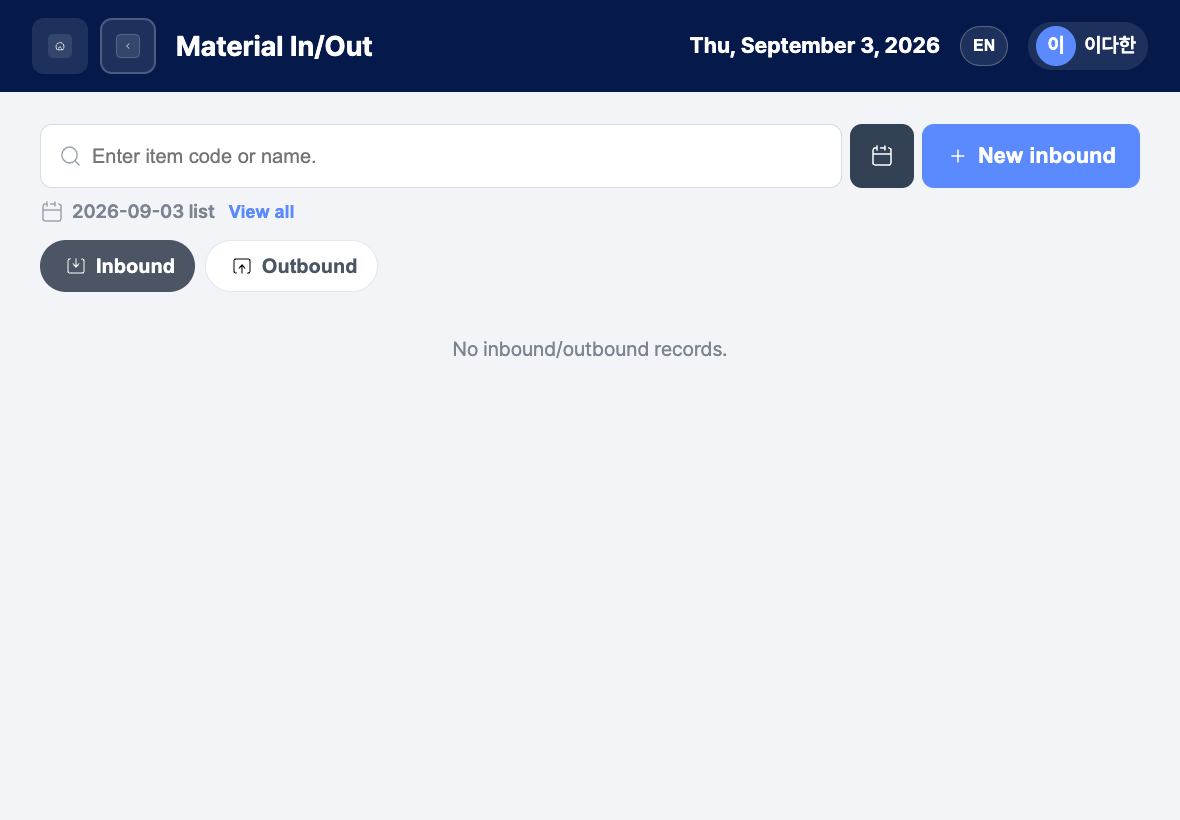
- Search box: Enter an item code or item name to filter the currently loaded list right away.
- Date / View all: At first, today's list is shown (displayed like
2026-09-04 list). Choose another date with the calendar button to see only the records planned for that day, and tap View all next to the date to see everything regardless of date. - Inbound / Outbound tabs: Switch between inbound and outbound.
- Material cards: Show the item code and item type, item name, status (Waiting inbound/Inbound complete, Waiting outbound/Outbound complete), Inbound qty/Outbound qty, and Inbound price/Moving avg. price.
- Waiting cards: Details and Process inbound/Process outbound buttons
- Completed cards: Details button
- Next: Appears below the list when there are more cards, and loads the next cards.
Process waiting records
- Choose the Inbound or Outbound tab.
- Tap Process inbound/Process outbound on a Waiting inbound or Waiting outbound card.
- Check the item, quantity, unit price, planned date, and inbound date (outbound date). If anything is different, tap Edit next to the field to correct it.
- Tap Next.
- Tap Add inbound location (or Add outbound location), choose a warehouse, and tap Add. Each warehouse row shows the Current stock of that material.
- Tap the quantity button on each warehouse row to split the quantity across warehouses. Remove a warehouse added by mistake with the trash icon.
- Tap Next to save.
Register new inbound or outbound records
- Tap New inbound or New outbound.
- In the
Select inbound method.(orSelect outbound method.) window, choose a method.- Manual entry: Choose from the item list. → Material in/out — manual entry
- AI recognition: Take a photo of the material label to read it. → Material in/out — AI recognition
- Barcode scan: Scan the item barcode. → Material in/out — barcode
- Follow the guide for each method to enter the item, quantity, and warehouses, then save.
View details after completion
- When saving is finished, the
Inbound has been processed.(orOutbound has been processed.) completion screen appears. - Tap View details to see what you just processed. Tap Go to list, or wait 7 seconds, to return to the list, which is then refreshed.
- To view it again later, tap Details on the card. It shows the item information, inbound (outbound) information and remarks, a table of quantities by warehouse, and the total quantity, and you return with Back to list. You cannot make changes on the detail screen.
FAQ
Q. It will not move to the next step.
If the process quantity is 0, Enter a quantity. appears and you cannot move on. Enter a quantity. In the warehouse allocation step, match the quantities by following the guide at the bottom of the screen (such as the remaining quantity).
Q. It says Allocated quantity exceeds the process quantity.
The total quantity split across warehouses is larger than the process quantity. Reduce the quantities by warehouse.
Q. It says The process date cannot be later than today.
Choose today or an earlier date for the planned date and inbound date (outbound date).
Q. For outbound, a message says outbound is possible only for registered materials and asks me to register the item first.
Materials that are not registered cannot be issued. Ask someone to register the item first in New Item Registration on the office PC admin screen. If there is no material information at all, Material information is missing. appears.
Q. I tapped Save, but the completion screen did not appear. The save was rejected. Check the error message on the screen, correct the details, and save again.
Q. The category or vendor shows as None.
The category, vendor, unit name, and unit symbol of a registered item are filled in automatically from the item information. If the item information has no value, it shows as None.
Related menus
- Material in/out — manual entry — Choose an item from the list for new inbound or outbound.
- Material in/out — barcode — Scan a barcode for new inbound or outbound.
- Material in/out — AI recognition — Take a photo of a label for new inbound or outbound.
- Material In/Out by Material — Material in/out on the office PC admin screen.
- New Item Registration — Register the materials to issue first.