Material in/out — manual entry
On this shop-floor screen, you register new inbound or outbound records by choosing a material from the item list. Choose the item, check the quantity, price, and dates, then split the quantity across warehouses and save to apply it to stock by warehouse.
Screen layout
The top shows the steps Select item → Enter inbound info → Inbound location → Done (for outbound: Enter outbound info and Outbound location). The first step shows the search box, the Barcode scan and Register as a new item buttons, and a list of item cards.
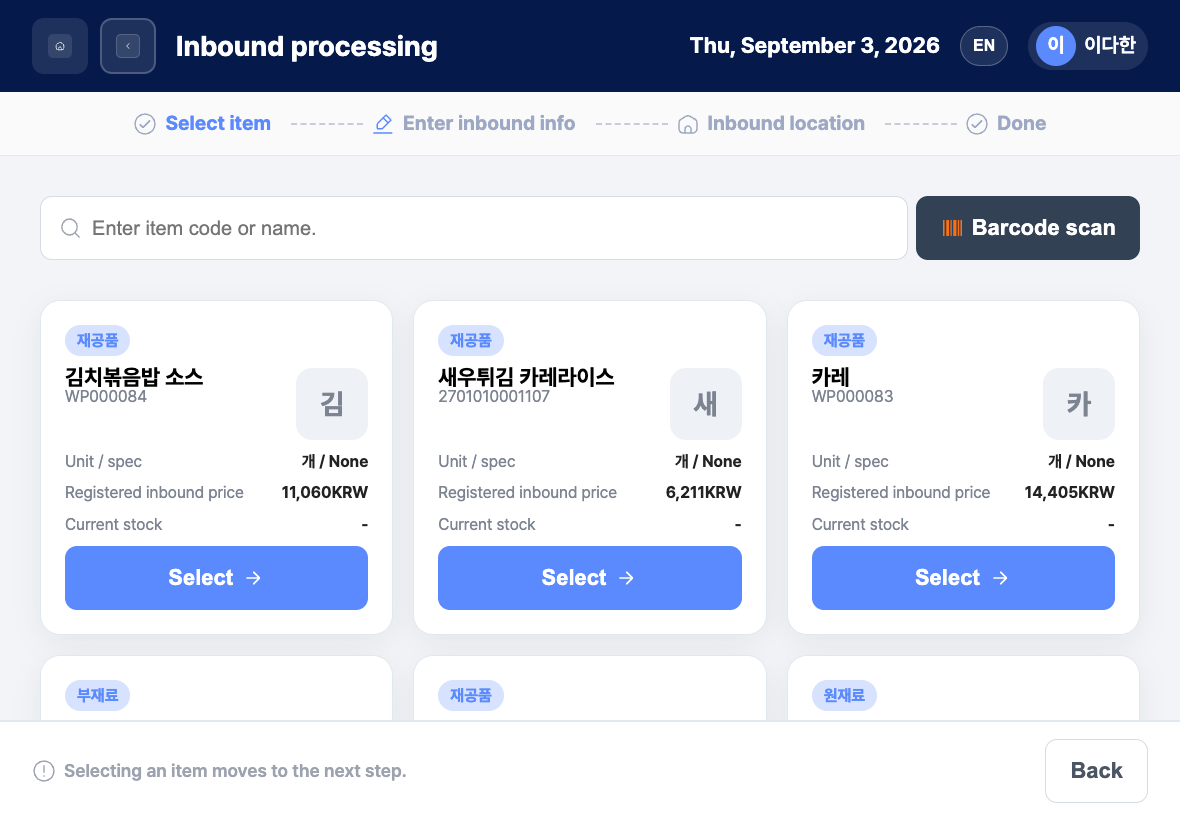
- Search box: Find items in use by item code or item name.
- Barcode scan: Scan an item barcode to choose it right away.
- Register as a new item: Register an item that is not in the list and receive it.
- Item cards: Show the item type, item name and code, Unit symbol / spec, Registered inbound price (Registered outbound price for outbound), and Current stock. Tap Select to move to the next step.
- Back: Return to the previous step.
Register by manual entry
- In the Material in/out list, tap New inbound or New outbound.
- In the method selection window, tap Manual entry.
- Enter an item code or item name in the search box, and tap Select on the matching item card.
- Check the quantity, price, planned date, and inbound date (outbound date), and correct them with Edit if needed. The category, vendor, and unit name are filled in from the item information.
- Tap Next.
- Add warehouses with Add inbound location (or Add outbound location). Each warehouse row shows the Current stock of that material.
- Split the quantity so that the total across warehouses equals the process quantity.
- Tap Next to save. On the completion screen, tap View details or Go to list, or wait 7 seconds to return to the list automatically.
Register an unregistered item (inbound)
- In the item selection step, tap Register as a new item.
- Enter the Item name, and if needed, the Item code and Spec as well.
- Choose the Item type (Raw Material, Sub Material, Work-in-Process, or Finished Product).
- Search for and choose the Unit name. The unit symbol is filled in automatically.
- If needed, also search for and choose the Category and Vendor.
- Enter the quantity, price, and dates, allocate warehouses, and save.
FAQ
Q. It will not move to the next step. Check that you tapped Select on an item and that the process quantity is not 0.
Q. It says Allocated quantity exceeds the process quantity.
The total quantity split across warehouses is larger than the process quantity. Reduce the quantities by warehouse so the total matches.
Q. It says The process date cannot be later than today. or that the process date cannot be earlier than the planned date.
Choose today or an earlier date. For new registrations, the inbound date (outbound date) cannot be earlier than the planned date, so check the planned date and inbound date (outbound date) together.
Q. For outbound, it says Material information is missing.
Outbound handles registered materials only. Ask someone to check on the office PC admin screen that the material is registered in New Item Registration.
Q. I tapped Save, but the completion screen did not appear. The save was rejected. Check the error message on the screen and save again.
Related menus
- Material in/out list — View waiting and completed inbound and outbound records.
- Material in/out — barcode — Scan a barcode to find the item.
- Material in/out — AI recognition — Take a photo of a label to read the item, and receive unregistered items too.
- New Item Registration — Register the items to receive or issue.
- Item Category Registration, Partner Registration, Standard Unit Management — Register the master data to choose for new items.