Order Management
Overview
Use Order Management to keep customer orders organized from intake through production and shipment. Review the order list first, then register, correct, or remove an order only after confirming the customer, items, quantities, and delivery dates.
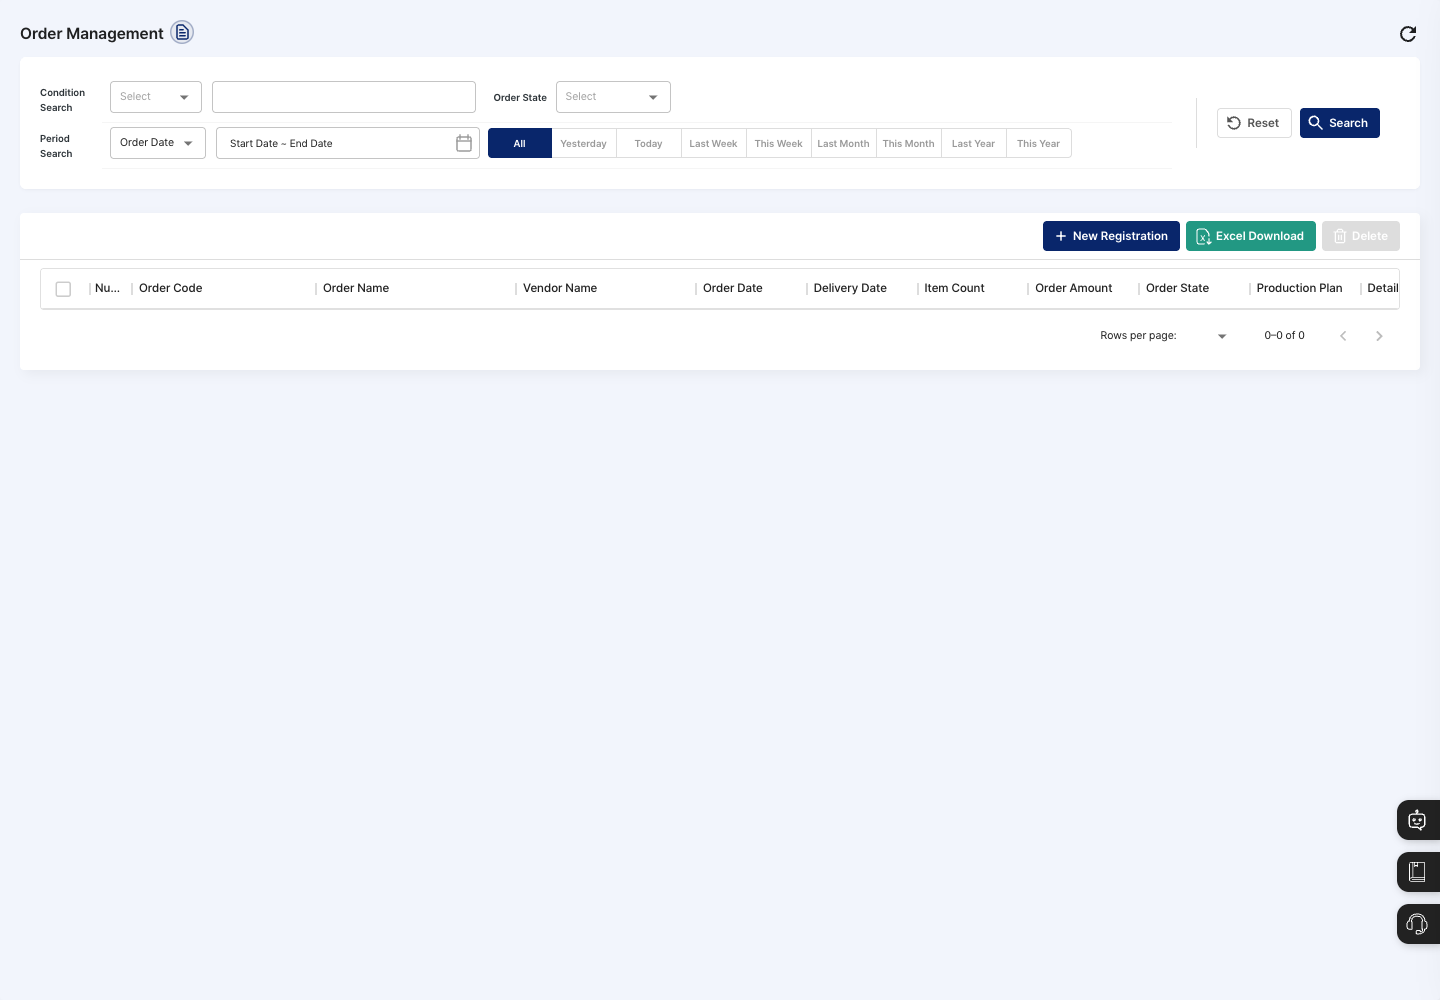
Access
- In the sidebar, open Order Management.
Before you begin
- Register the partner, person in charge, currency, order items, and each item's material composition first.
- An order code can be generated automatically or entered manually, so check the company's code-management method.
- To auto-fill from a purchase order file, prepare a PDF, image (
.png,.jpg,.jpeg), Excel (.xls,.xlsx,.xlsm), or CSV file. The file must be 10 MB or smaller. - Create an order directly on a single registration screen. Items can be added on the screen or auto-filled by uploading a purchase order file; review auto-filled content before saving on the same screen.
Required information
- Order code when entered manually, order name, order type, usage status, partner, person in charge, currency, and order status are required. During registration, the order status is shown as
Order Pending. - Add at least one item and enter VAT, order quantity, and unit price for each item.
- Each item must be matched to a valid item and must have at least one material composition. The final order amount must be greater than 0.
- You can open the list without entering anything. Add search conditions only when you need to narrow the list by period, status, keyword, or another available filter.
Save and processing checks
- When a purchase order file is uploaded, the file is stored and an AI preview is requested. When it completes, the order name, amount, currency, order date, expected delivery date, description, delivery address, customer PO number, partner name/code, and item candidates are auto-filled.
- If AI cannot match an item row, manually verify the item and its material composition before saving.
- Unsupported file types, files larger than 10 MB, unreadable files, files not recognized as purchase orders, and AI recognition timeouts are shown as errors.
- Before saving, confirm that the order date, expected delivery date, partner, person in charge, currency, items, material composition, and final amount match the contract.
- Confirm the save-completion message and that the list is updated before proceeding with subsequent production and shipment work.
Registration
- Click Register from the list.
- Select the partner and person in charge, then enter the items, quantities, unit prices, and expected delivery date from the actual purchase order.
- Click Save to complete registration.
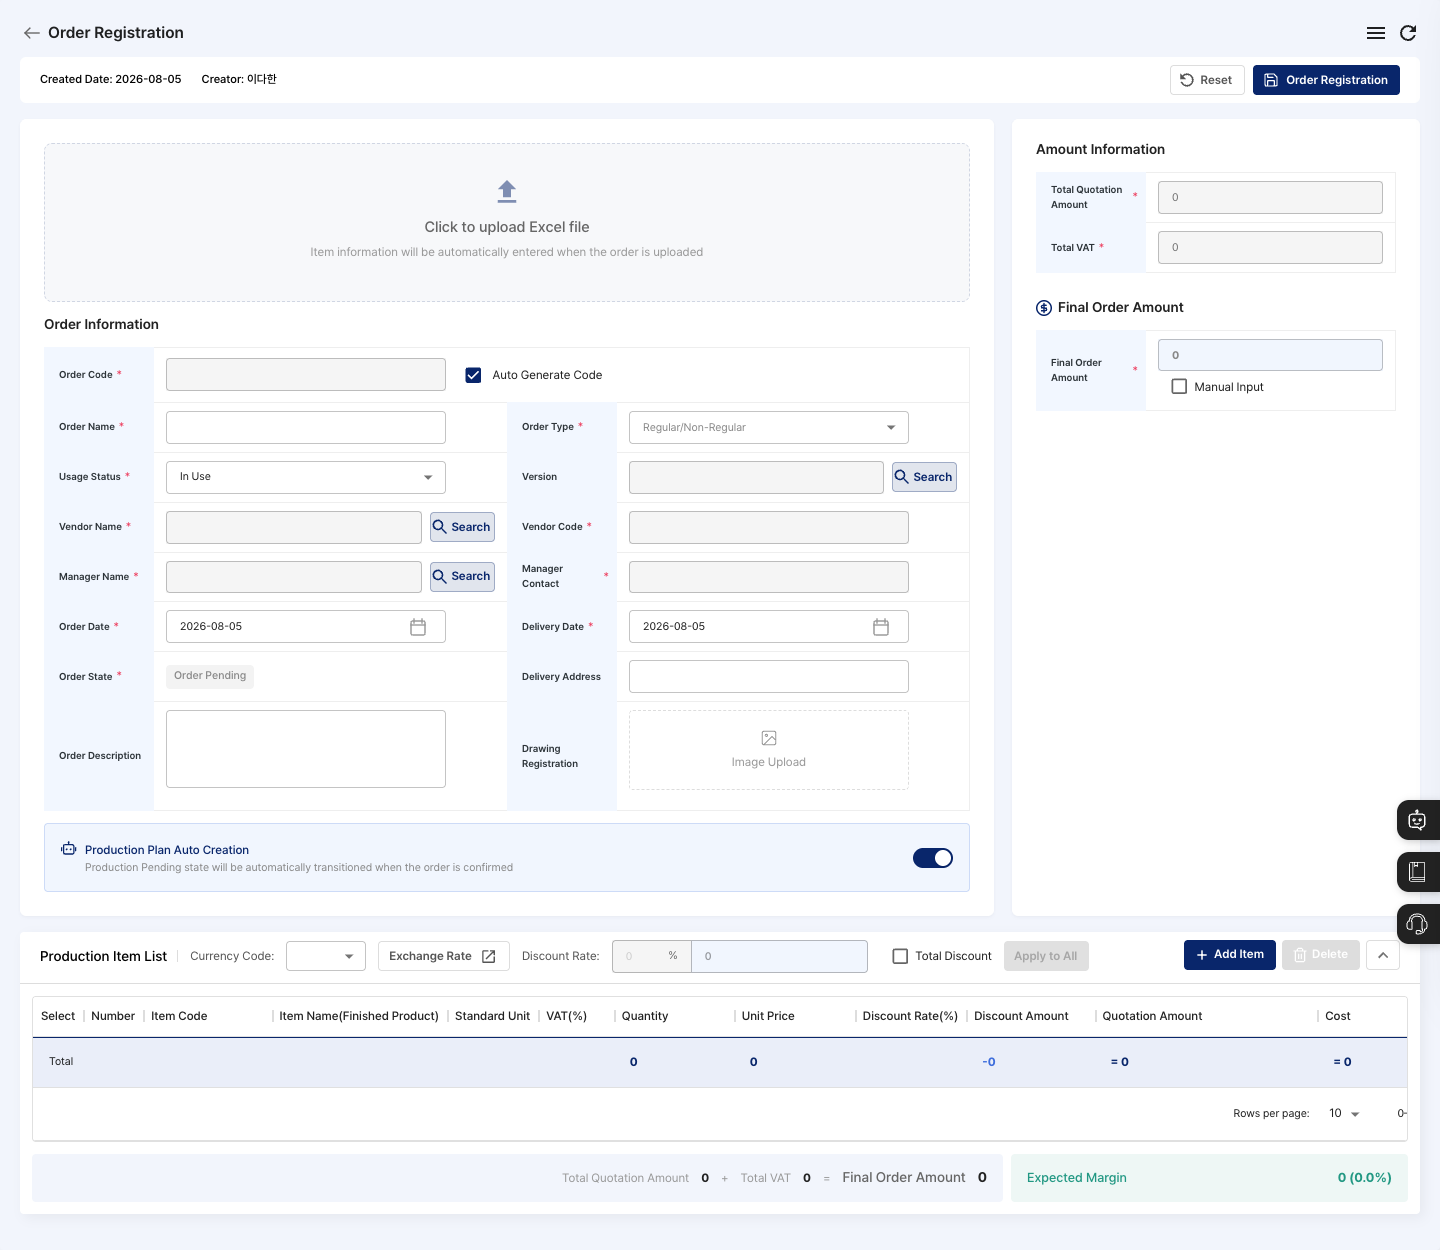
AI purchase order upload
- Add a PDF, image, Excel, or CSV purchase order file in the upload area at the top of the registration screen.
- Wait about 15 seconds for AI recognition and auto-fill to complete.
- Review the partner, order date, expected delivery date, delivery address, supply amount, VAT, final order amount, and item rows against the purchase order.
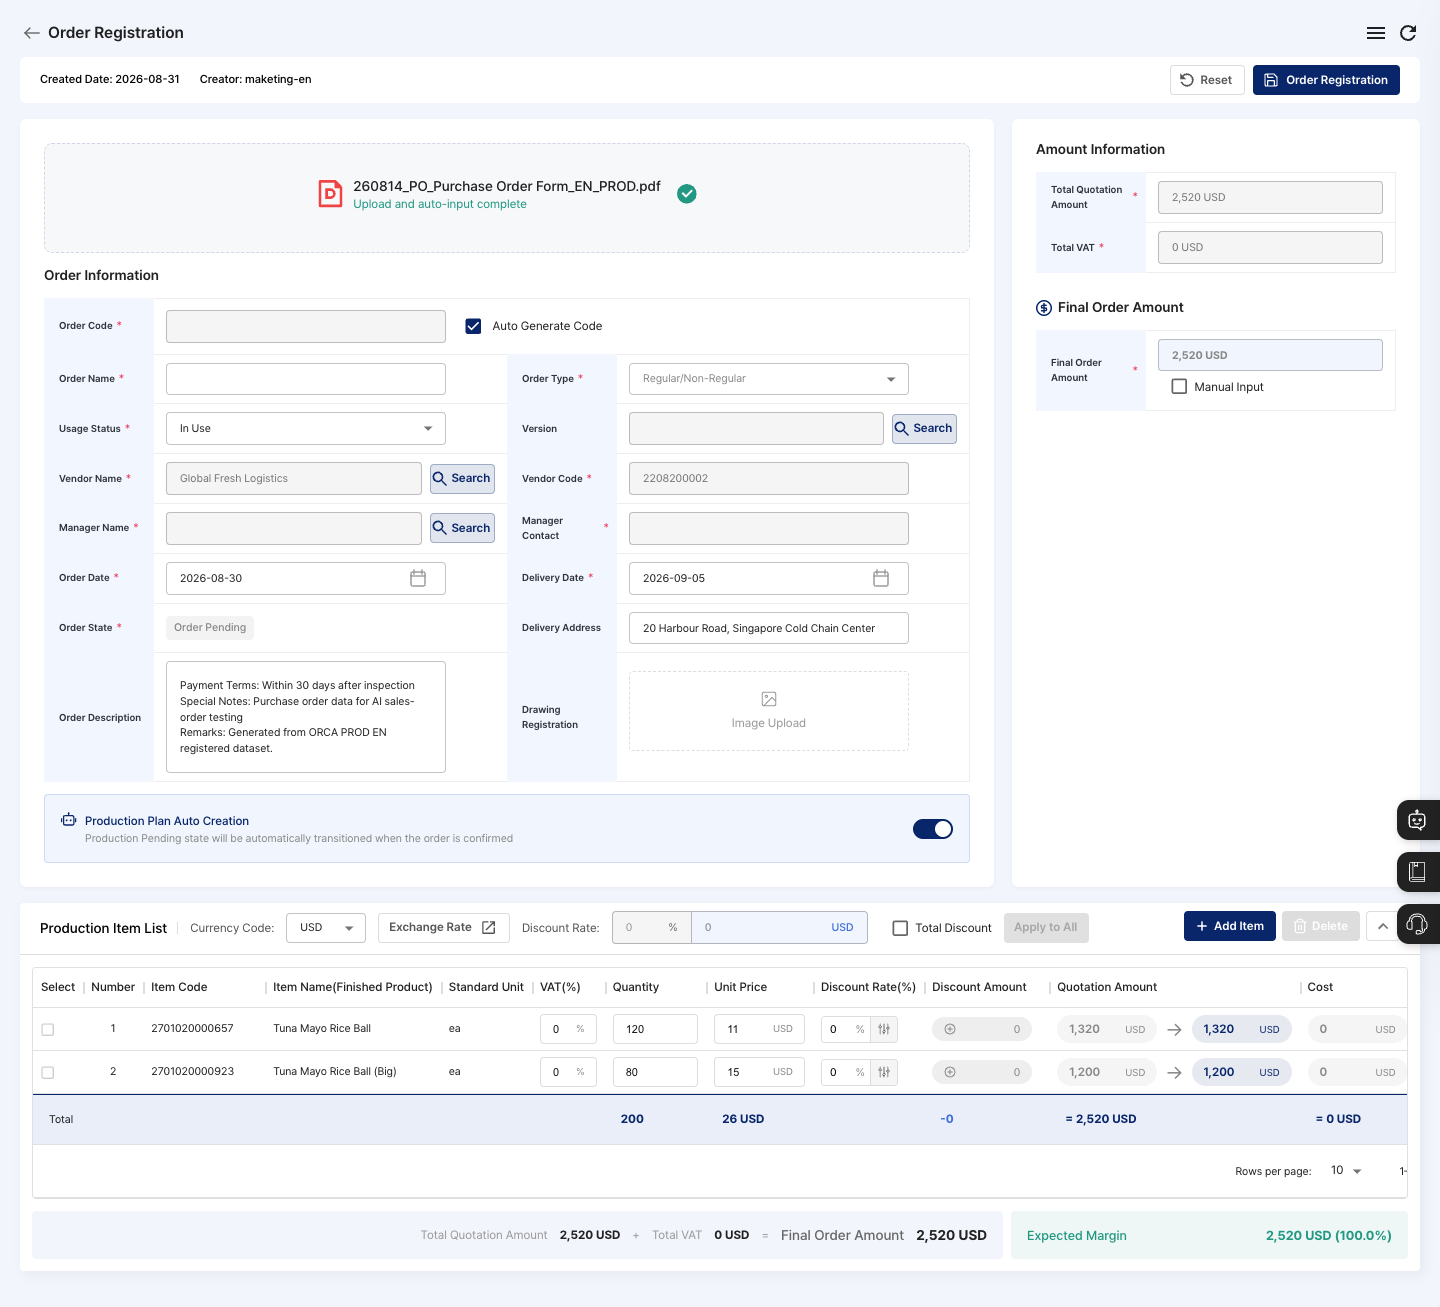
Item detail rows
- In the auto-filled production item list, click the expand button on the right side of an item row.
- Check the lower detail rows for item composition, quantity, unit price, and amount.
- If an AI-matched item does not match the purchase order item name or specification, select the item again or correct the row before saving.
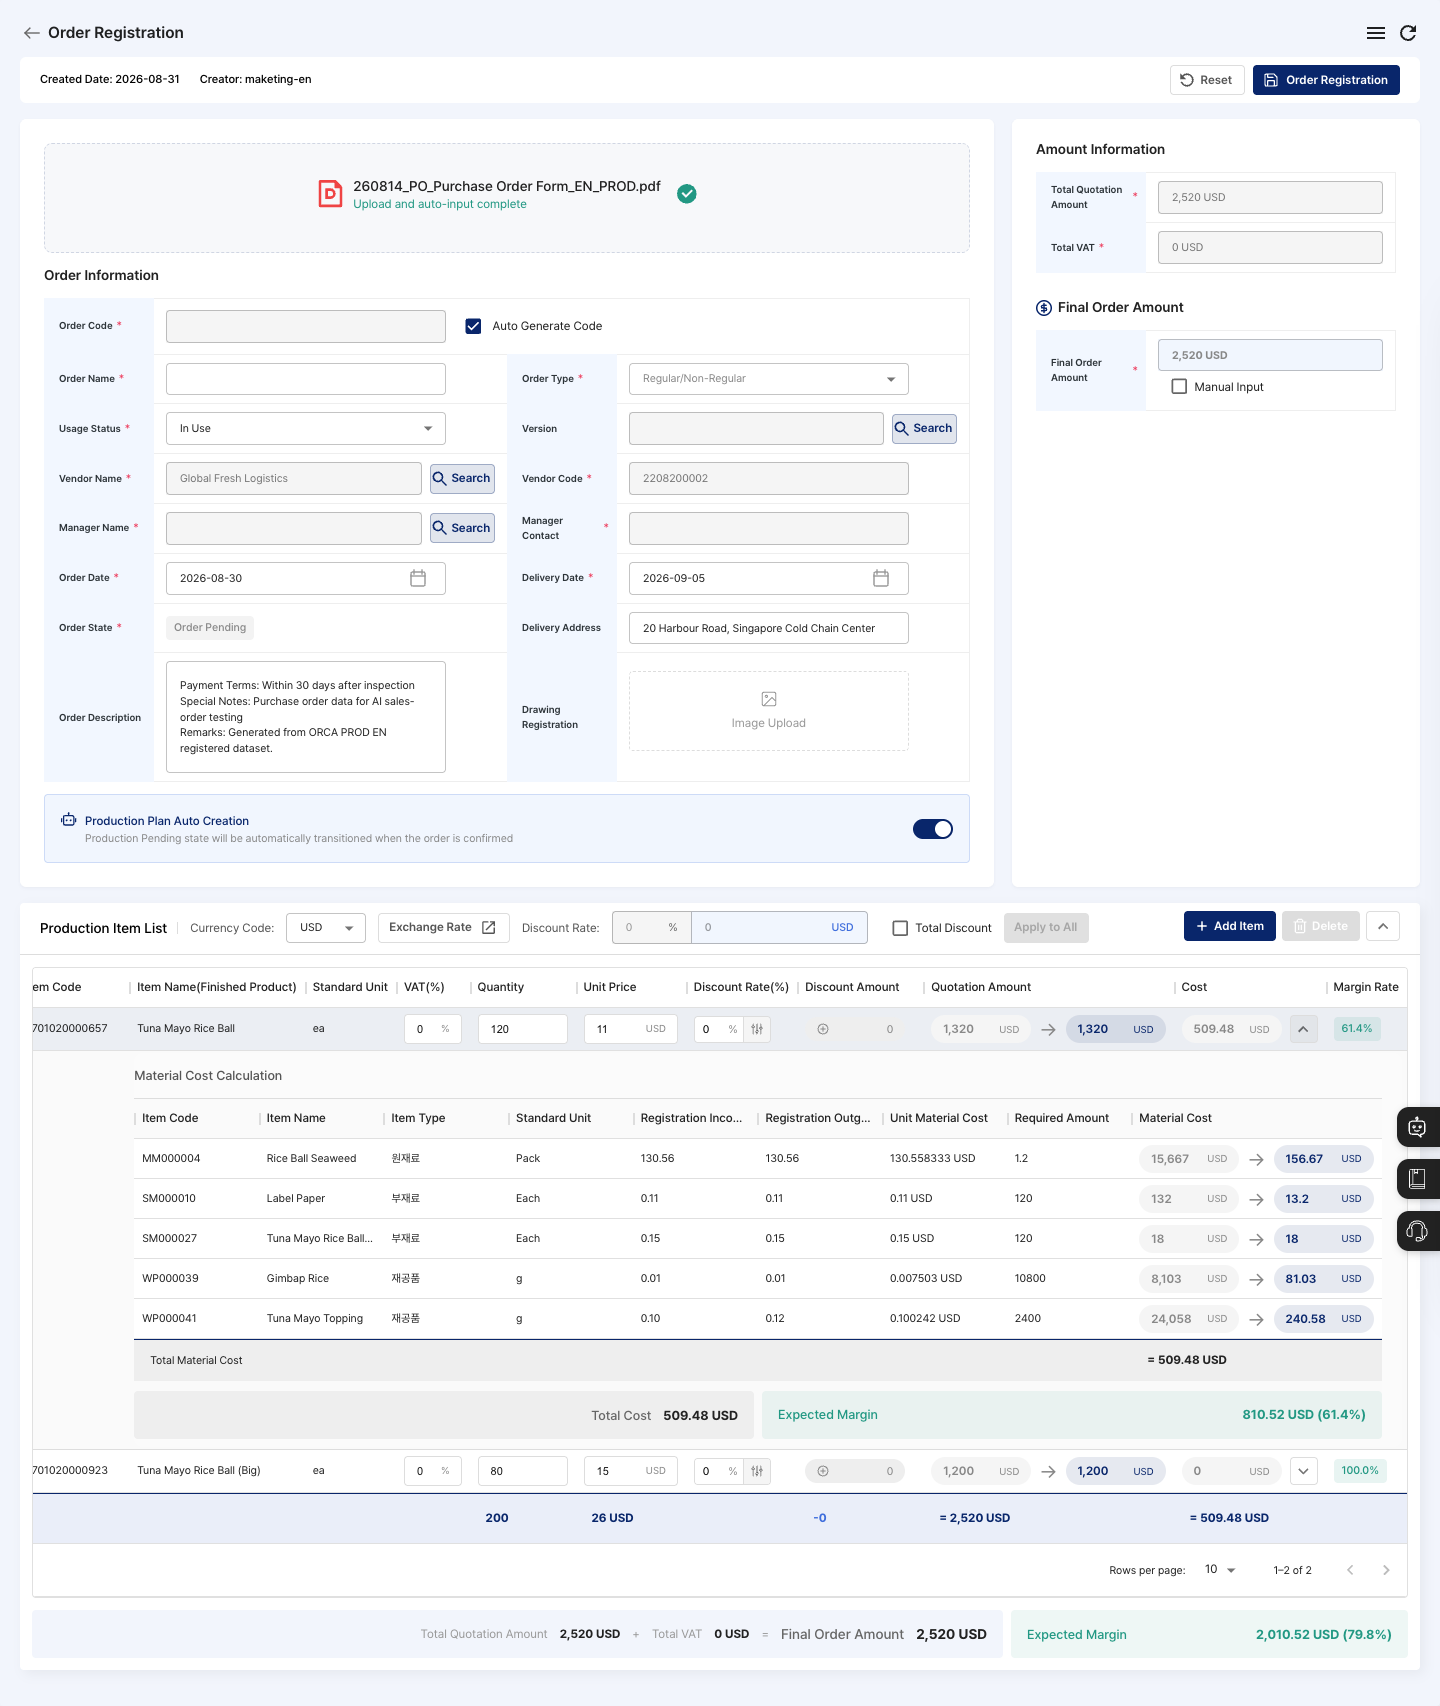
Details and editing
- Click the item in the list to open its details.
- Click Edit, update only the fields that changed, then save.
Deletion
- Open the item you want to remove and click Delete.
- Check the item shown in the confirmation dialog, then confirm deletion.
- If production or shipment work is already linked to the order, deletion may be blocked. Check the related work before removing it.
Permissions and notes
The buttons you see depend on your permissions and the features enabled for your company. If a needed action is missing, ask an administrator to check your access.